Tag Archives: human

Bariatric surgery

Below is a narrated animation of body mass index and Roux-en-Y gastric bypass. Click here to license this video on Alila Medical Media website.

Bariatric surgery, or weight loss surgery, refers to a variety of surgical procedures for treatment of morbid obesity. Obesity is determined by Body Mass Index (BMI) which is calculated as the ratio of body weight over square of body height. The higher the BMI the higher the extend of obesity.  A normal BMI is between 20 and 25. An individual is considered morbidly obese if he or she has a body mass index of 40 or more, or of 35 or more and with obesity-related health problems such as diabetes, sleep apnea or hypertension.

Weight loss is achieved by reducing the size of the stomach. Smaller stomach makes you feel full faster and therefore makes it easier to reduce the amount of food intake.

Roux en-Y Gastric bypass (RNY)

This is the most commonly performed bariatric surgical procedure and is considered the gold standard for weight loss treatment. This procedure includes two steps:
1. The stomach is divided into two part : one small pouch at the top of the stomach where it is connected to the esophagus (gastric pouch in Fig. 1) and the rest of the stomach which will be “bypassed”, the two parts are separated and stapled.
2. Rerouting of the intestine: the intestine is cut at about 45cm (18in) down from the end of the stomach. The first part of the intestine (the duodenum) will be “bypassed”. The top end of the second part (the jejunum) is pulled up and connected to the gastric pouch created in step 1. The lower end of the duodenum is reconnected to the jejunum at a lower point (Fig.1). The new configuration has a shape of an Y, hence the name of the procedure.

Click here to see a video animation of gastric bypass procedure on Alila Medical Media website where the video is also available for licensing.

Roux-en-Y Gastric Bypass (RNY) surgery
Fig. 1: Roux-en-Y gastric bypass diagram. Note the passage of food and digestive juice after surgery. Click on image to see a larger version on Alila Medical Media website where the image is also available for licensing.


How weight loss is achieved?
Firstly, the volume of the stomach is now greatly reduced to a small pouch (usually less than 10% of the original volume) which is filled up fast after a small amount of food intake. This sends a signal to the brain that the stomach is full and generates a feeling of fullness (satiety). This helps to stop eating. Also, if eating continues, vomiting and discomfort may follow. Secondly, as the first part of the intestine (the duodenum) is bypassed, the amount of nutrition absorbed by the body is greatly reduced. In normal digestion, this is where most of the nutrition is absorbed. Malabsorption contributes to weight loss effect.

Complications
While this procedure is proven as an efficient long term weight loss treatment, it associates with significant complication risks. These include: leakage along the staple lines and surgical connections leading to infection and abscess formation; stricture and obstruction of digestive tract due to scar formation; dumping syndrome; nutritional deficiencies; and other general surgical risks  due to complexity of the procedure.

Mini Gastric bypass (MGB)

This is a modification of the more common RNY procedure described above. Here are the differences: (see Fig. 2)
1. In step 1 a long tube is created instead of a pouch.
2. In step 2, the intestine is NOT cut, it is pulled up and hooked up with the new stomach tube.

Mini gastric bypass surgery

Fig. 2: Mini gastric bypass diagram. Click on image to see a larger version on Alila Medical Media website where the image is also available for licensing.


Click here to see a video animation of mini gastric bypass procedure on Alila Medical Media website where the video is also available for licensing.

This procedure is becoming more and more popular as it produces good weight loss results and is simpler than the original procedure resulting in less complication risks. Less cutting and stapling lowers the risk of leakage and infection. It also reduces the bile reflux possibility  as the intestinal rerouting is set at a lower point on the stomach.

                                                                         > NEXT: Gastric Sleeve and Gastric Lap Band

                                                                                                            > See all Digestive topics


Email this to someoneShare on FacebookTweet about this on TwitterShare on Google+Share on LinkedIn

GERD and Heartburn (with video)
Gastroesophageal reflux disease

This video and other animations of the digestive system are available for licensing on Alila Medical Media website. Click here!


Gastroesophageal reflux disease (GERD) or gastric reflux disease is  a chronic condition where acid from the stomach flows up and damages the mucosa of the esophagus.
At the junction between the esophagus and the stomach is the lower esophageal sphincter (LES). The LES is a ring of muscle that is generally closed tight to prevent stomach acid from coming up. In normal digestion, the LES opens shortly to allow food bolus passing down to the stomach and closes back tight instantly. GERD occurs when the LES is abnormally relaxed and can not close properly (Fig. 1). Heartburn is a burning sensation in the chest associated with each regurgitation of gastric acid and is the most prominent symptom of GERD. 

Gastric reflux, labeled diagram.
Fig. 1: Abnormal relaxation of the lower esophageal sphincter as cause of GERD. Click on image to see a larger version on  Alila Medical Media website where the image is also available for licensing.


Hiatus hernia is believed to be another cause of GERD. Hiatus hernia or hiatal hernia is a condition where the top portion of the stomach is pulled up forming a herniation above  the diaphragm. This situation somehow compromises the esophagus – stomach barrier and facilitates acid reflux.

Hiatal Hernia
Fig. 2: Types of hiatal hernia. Click on image to see a larger version on  Alila Medical Media website where the image is also available for licensing.


Treatment

Treatment includes dieting and medication. Proton-pump inhibitors, which act to reduce gastric acid production, are drugs of choice. If these fail, a surgery may be recommended. In a procedure called Nissen fundoplication, the top portion of the stomach is wrapped around the lower part of esophagus and sewn into place. This way, the muscles in the wall of the stomach reinforce the closure of the esophagus. This surgical procedure is particularly recommended when hiatus hernia is present as this can be fixed at the same time. The procedure can be done with minimal invasive laparoscopic technique through small incisions with the aid of a camera.
Nissen Fundoplication Surgery
Fig. 3: Nissen fundoplication procedure.  Click on image to see a larger version on Alila Medical Media website where the image is also available for licensing.


                                                                                                                 > See all Digestive topics

Email this to someoneShare on FacebookTweet about this on TwitterShare on Google+Share on LinkedIn

Common ankle injuries

Ankle anatomy

The ankle includes three bones : the tibia (shinbone), the fibula and the talus (Fig. 1). Articulations between these bones make up the ankle joint.

Ankle joint labeled diagram.
Fig.1: Anatomy of the ankle joint.  Click on image to see a larger version on  Alila Medical Media website where the image is also available for licensing.


The ankle is stabilized by the following ligaments (Fig. 2):
– tibiofibular ligaments connect the tibia to the fibula, one in front (anterior tibiofibular) and one in the back (posterior tibiofibular);
– lateral collateral ligaments connect the fibula to the talus (two of them: again one in front and one in the back) and to the calcaneus (the heel bone); and
– on the medial side, a multipart deltoid ligament connects the tibia to the talus and other bones of foot (the calcaneus and navicular).

Ligaments of ankle labeled.
Fig.2 : Ligaments of ankle.  Click on image to see a larger version on  Alila Medical Media website where the image is also available for licensing.


Common ankle injuries include ankle sprains and ankle fractures.

Ankle sprain

Ankle sprain refers to injury to any of the ligaments of the ankle joint. This happens when the  ankle is rolled or twisted beyond the normal range of motion and the ligaments are overstretched and torn. Commonly, the ankle moves suddenly outward while the foot turns inward resulting in overstretching of the ligaments on the outside of the foot (lateral ligaments). This type of sprain is called inversion (Fig. 3). On the other hand, when the ankle moves inwards and the foot turns outwards it’s the ligaments on the inside (medial) that are hurt. This type of sprain is called eversion and is much less common.
Ankle sprains
Fig.3 :Types of ankle sprain, illustrated for the right foot, anterior view. Click on image to see a larger version on Alila Medical Media website where the image is also available for licensing.


Ankle sprains are common sport injuries. They can range from mild to severe depending on how bad is the damage and how many ligaments are involved (Fig. 4)

Ankle sprain grading
Fig.4 :Grades of ankle sprain. Click on image to see a larger version on Alila Medical Media website where the image is also available for licensing.


In most cases sprains can be treated with rest, ice pack, compression with a bandage and elevation (raising your foot up) to reduce swelling. Severe injuries may require surgery.

Ankle fracture

Broken bones of the ankle, a common sport injury. Commonly due to a direct blow to the ankle or a fall. Pott’s fracture (Fig. 5) represents a typical situation when the ankle receives a blow from the outside resulting in broken fibula at the point of impact. The talus moves outward shearing off a piece of the tibia. Medial ligaments are also injured in this case.

Pott's fracture labeled.
                                                                                   Fig. 5: Pott’s fracture. Click on image to see a larger version on Alila Medical Media website where the image is also available for licensing.


Imaging techniques such as x-ray or CT-scan are used to determine the severity of fractures. If the broken bones are still in their normal position they will be immobilized (with a cast for example) to facilitate healing. Bones that are fallen out of place will require surgery. During surgery the bones are positioned back to their normal place, screws and metal plates are then used to keep the fragments together.

                                                                                                              >  See all Orthopedic topics

Email this to someoneShare on FacebookTweet about this on TwitterShare on Google+Share on LinkedIn

Common knee injuries and surgical repair, part 2

Knee sprains

Knee sprains refer to injuries in any of the ligaments of the knee. The most commonly injured are medial collateral ligament (MCL) running along the inner side of the knee, lateral collateral ligament (LCL) running along the outer side of the knee and anterior cruciate ligament (ACL) that connects the femur and tibia inside the joint (Fig. 1). For more about knee joint anatomy click here.

Knee sprains drawing.
Fig. 1: Common types of knee sprain.  Click on image to see a larger version on Alila Medical Media website where the image is also available for licensing.


Commonly, injury happens after a direct blow to the knee. When the knee is hit from outside it moves inwards and the ligament on the inside (the MCL) is overstretched and injured. Inversely, when the blow comes from the inside of the knee it’s the outside ligament (the LCL) that is hurt. ACL injuries, on the other hand, are caused by twisting movement of the knee and are most common among athletes in sports that involve sudden rotation movement of lower leg.

Anterior Cruciate Ligament injury


Fig. 2: Completely torn ACL.  Click on image to see a larger version on Alila Medical Media website where the image is also available for licensing.

 
Mild sprains (stretched ligament but no tear or small tears) can be treated with rest, knee exercises and physical therapy. Complete tears require surgical repair or reconstruction.


ACL reconstruction surgery

Below is a narrated animation of ACL reconstruction surgery. Click here to license this video and/or other orthopedic videos on Alila Medical Media website.

This procedure is used to replace a severely damaged or completely torn anterior cruciate ligament (ACL) with a graft. The graft is a piece of  healthy ligament taken from the same person or a donor. Graft from the same person is called autograft and usually works best. The procedure is detailed in Fig. 3. Autograft is commonly taken from the patellar ligament (one that connects the kneecap to the tibia), but hamstring tendon may also be used. See the figure legends for details of procedure, step 1 is done through open surgery, the rest are done through an arthroscope.

ACL reconstruction surgery unlabeled diagram.
Fig. 3: Steps of arthroscopic knee surgery for reconstruction of  anterior cruciate ligament injury: 1. Graft taken from kneecap and patellar ligament; 2. Torn ACL shown; 3. Damaged ACL removed and a channel is drilled through tibia and femur; 4. graft inserted and secured with screws; 5. graft in place. Click on image to see a larger version on Alila Medical Media website where the image is also available for licensing.


                                                                                                              >  See all Orthopedic topics

Email this to someoneShare on FacebookTweet about this on TwitterShare on Google+Share on LinkedIn

Common knee injuries and surgical repair, part 1

Knee anatomy

The knee has three bones : the femur (the thigh bone), the tibia (the shinbone) and the patella (the kneecap). The femur and the tibia form a hinge joint. The joint is enclosed by the joint capsule at the back and on the sides, and is covered by the patella and patellar ligament in front. The knee joint is stabilized mainly by the tendons of quadriceps femoris muscle in front and semimembranosus muscle (one of the hamstrings) on the back. Strengthening these two muscles  therefore helps to reduce the risk of knee injuries.

Knee joint labeled drawing.

Fig.1 : Midsagittal section of the knee joint. Click on image to see a larger version on Alila Medical Media website where the image is also available for licensing.


Apart from the regular articular cartilage that cover the end surfaces of the three bones there are two additional pads of cartilage that are unique to the knee joint : medial meniscus and lateral meniscus (Fig. 2 and Fig. 3). The menisci act as shock absorbers to cushion the joint.

Two pairs of ligaments help to stabilize the knee : collateral ligaments run along two sides of the knee (Fig. 2), and cruciate ligaments which connect the femur and tibia in the center of the joint and cross each other in the from of an X (hence the names) : anterior cruciate ligament (ACL) and posterior cruciate ligament (PCL) (Fig. 2 and Fig. 3).

Knee joint anatomy

Fig. 2 : Front view of the right knee (the kneecap is removed in this picture to show structures behind).  Click on image to see a larger version on Alila Medical Media website where the image is also available for licensing.


Knee meniscus labeled diagram.
Fig. 3 : The right knee viewed from top (femur removed to show structures underneath). Click on image to see a larger version on Alila Medical Media website where the image is also available for licensing.


Meniscus tear and repair

Commonly referred to as torn cartilage, torn meniscus is a common sport injury. Mild injuries maybe treated with rest, ice, compression and elevation (the RICE approach). Larger tears may require surgery. The goal of surgery is to remove the damaged tissue which is the source of irritation, pain and possibly inflammation, and attempt to induce healing. Treatments vary depending on the location of the tear. If the tear is located on the outer border of the meniscus (the red zone, see Fig. 3) where there is a good blood supply, the damaged loose tissue will be removed and sutures will be used to tight the cartilage together to facilitate self healing. If the tear is located on the inner part (the white zone, see Fig. 3) where the blood supply is poor and hence healing is unlikely, the damaged part is simply removed (partial meniscectomy) (Fig. 4).

Minimal invasive arthroscopic surgery is commonly used for meniscus repair. In case of large tears, open surgery may be required.

Click here to see an animation of arthroscopic meniscus repair on Alila Medical Media website where the video is also available for licensing.

Meniscus tear and surgery treatment
Fig. 4 : Treatment of meniscus tear depends on its location. Click on image to see a larger version on Alila Medical Media website where the image is also available for licensing.


                                                                                                              >  See all Orthopedic topics


Email this to someoneShare on FacebookTweet about this on TwitterShare on Google+Share on LinkedIn

Common shoulder injuries and surgical repair (part 1)

Anatomy


There are three bones in the shoulder: the humerus (the bone of the upper arm), the scapula (shoulder blade) and the clavicle (collarbone). Articulations between these bones make up the shoulder joints. The main joint, commonly referred to as “the shoulder joint”, is the joint between the head of the humerus and glenoid cavity of the scapula and is called the humeroscapular or glenohumeral joint. The second joint of the shoulder is formed by the articulation between the clavicle and the acromion (extension of the scapula that forms the top of the shoulder) and is called acromioclavicular joint or AC joint. The two joints are stabilized by associated muscles and ligaments.

Shoulder anatomy
Fig.1: Main components of the shoulder joint. Click on image to see a larger version on  Alila Medical Media website where the image is also available for licensing.


Shoulder dislocation

Shoulder dislocation occurs when the humeral head slips out of the pocket  made by glenoid cavity of the scapula (Fig. 2). This usually happens as a result of trauma (fall, sport injury,..). Dislocation can be anterior where the humerus slips to the front or posterior where it dislocates behind the normal position. Anterior dislocation is more common.

Shoulder dislocation
Fig.2 : Types of shoulder dislocation. Click on image to see a larger version on Alila Medical Media website where the image is also available for licensing.


Below is a narrated animation about shoulder dislocation, bankart lesion and repair. Click here to license this video and/or other orthopaedic videos on Alila Medical Media website.

Bankart lesion and shoulder instability

The glenoid cavity has a ring of fibrocartilage tissue called the labrum around it. The labrum makes the cavity deeper and helps to keep the humeral head in place (Fig.3). During anterior shoulder dislocation, the head of the humerus may be pressed against and damages the anterior portion of the labrum. This type of labral tear is called bankart. Damaged labrum makes it easier for the humeral head to slip out of place again. This vicious cycle leads to repeated shoulder dislocation and severely damaged labrum. The condition is called shoulder instability as it feels like slipping out anytime. Treatment includes physical therapy and, in some cases, surgery for bankart repair (see below).

Click here to see an animation of bankart lesion and arthroscopic repair  on Alila Medical Media website where the video is also available for licensing.

SLAP and bankart lesions
Fig. 3: Anatomy of the shoulder joint with the humerus slightly abducted to show the glenoid cavity and labrum. Types of labral lesions are shown on the right. Click on image to see a larger version on Alila Medical Media website where the image is also available for licensing.


Bankart repair

During surgery the damaged cartilage is removed, area is cleaned, small holes are then drilled into the bone of glenoid fossa to hold small suture anchors with threads. The threads are attached to the labrum and pulled tightly to hold the labrum to the glenoid (Fig.4). Over time, the labrum will reattach to the glenoid naturally. Physical therapy will be needed to regain the shoulder range of motions and strength.

Shoulder stabilization surgery
Fig.4: Steps of bankart repair surgery. See text for details. Click on image to see a larger version on Alila Medical Media website where the image is also available for licensing.


Bankart repair can be done with arthroscopic or open surgery. While arthroscopy is minimal invasive, open surgery maybe recommended for larger tears. In arthroscopic surgery only two or three small incisions are made, an arthroscope is inserted through one of the incision. Arthroscope is an instrument equipped with light and camera which transmits image of the joint to a computer screen. Other small tools are inserted  to carry out the repair (Fig.5).

Click here to see an animation of arthroscopic bankart repair.
Shoulder arthroscopy
Fig. 5 : Arthroscopic surgery for bankart repair. Click on image to see a larger version on Alila Medical Media website where the image is also available for licensing.


                                                                                                              >  See all Orthopedic topics

Email this to someoneShare on FacebookTweet about this on TwitterShare on Google+Share on LinkedIn

Male Reproductive System Gallery

Download diagrams of male organs anatomy and diseases, formation and structure of sperms.

Please note: Free downloads are intended to facilitate healthcare education for people in need in low income countries and can be used for educational purposes only. If you can afford it or if you plan to use the images for commercial purposes, please consider buying instead. You can find a larger image collection at higher resolution for sale at affordable prices on Alila Medical Media website.

To download: right click on full size image – choose “Save image as” and save it into your computer. By downloading from this website you acknowledge that you agree to our Conditions of Use.
To purchase larger sizes of the image: (left) click on full size image.

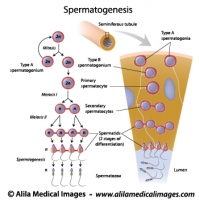
Spermatogenesis process, labeled diagram.
Process of sperm production and meiosis in seminiferous tubule, labeled diagram.
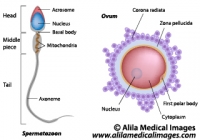
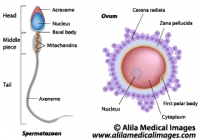
Ovum and spermatozoon structure, labeled diagram.
Egg and sperm cells anatomy, labeled drawing.
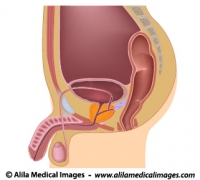
Male reproductive organs sagittal, unlabeled diagram.
Illustration of male reproductive system in median section
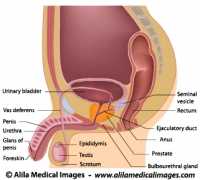
Male reproductive organs sagittal, labeled diagram.
Illustration of male reproductive system in median section
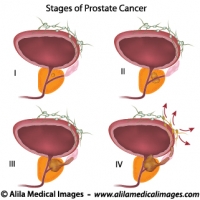
Prostate cancer staging, unlabeled diagram.
Illustration of staging of prostate gland cancer, from small tumor size to metastasis.
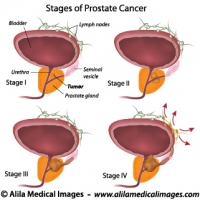
Prostate cancer staging, labeled diagram.
Illustration of staging of prostate gland cancer, from small tumor size to metastasis.


Email this to someoneShare on FacebookTweet about this on TwitterShare on Google+Share on LinkedIn

Lymphatic System Gallery

Download illustrations of major groups of lymph nodes, lymphatic organs and vessels, their anatomy, function, disorders and involvement in cancer metastasis.

Please note: Free downloads are intended to facilitate healthcare education for people in need in low income countries and can be used for educational purposes only. If you can afford it or if you plan to use the images for commercial purposes, please consider buying instead. You can find a larger image collection at higher resolution for sale at affordable prices on Alila Medical Media website.

To download: right click on full size image – choose “Save image as” and save it into your computer. By downloading from this website you acknowledge that you agree to our Conditions of Use.
To purchase larger sizes of the image: (left) click on full size image.

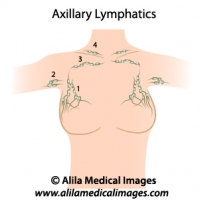
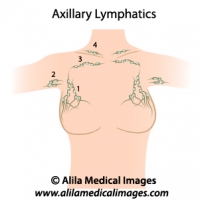
Axillary lymph nodes, medical drawing.
Axillary lymph nodes diagram, simple version. 1-3 = different groups of axillary nodes, 4= supraclavicular lymph nodes. Unlabeled diagram.
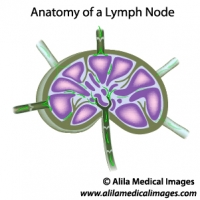
Lymph node structure, unlabeled diagram.
Diagram illustrating structure of a lymph node with lymph flow, unlabeled.
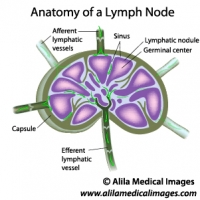
Lymph node structure, labeled diagram.
Diagram illustrating structure of a lymph node with lymph flow, labeled.
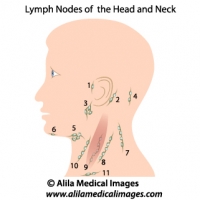
Lymph nodes of head and neck, medical drawing.
Lymph nodes of the head and neck, unlabeled. 1= preauricular, 2= posterior auricular, 3= parotid, 4= occipital, 5= submandibular, 6= submental, 7-10 = cervical, 11= supraclavicular.
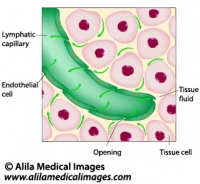
Lymphatic fluid drainage, labeled diagram.
Uptake of tissue fluid by lymphatic capillary, labeled drawing.
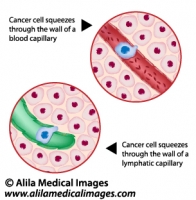
Metastatic cancer, medical drawing.
Cancer cell squeezes through the endothelium of blood and lymph vessel, illustration unlabeled.
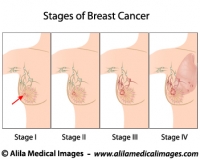
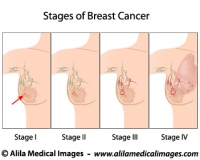
Breast cancer staging, diagram.
Stages of Breast Cancer, from small tumor to metastasis, medical illustration, unlabeled.
Lymphatic system, unlabeled diagram.
Human lymphatic system with all organs, major trunks, ducts and groups of lymph nodes illustrated, unlabeled illustration.
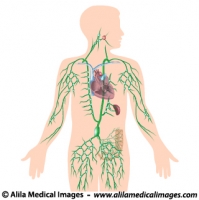
Lymphatic system, labeled diagram.
Human lymphatic system with all organs, major trunks, ducts and groups of lymph nodes illustrated, labeled illustration.


Email this to someoneShare on FacebookTweet about this on TwitterShare on Google+Share on LinkedIn

Female Reproductive System Gallery

Download cliparts illustrating anatomy of reproduction organs, oogenesis and sexual cycle, hormonal control, women’s diseases and conditions.

Please note: Free downloads are intended to facilitate healthcare education for people in need in low income countries and can be used for educational purposes only. If you can afford it or if you plan to use the images for commercial purposes, please consider buying instead. You can find a larger image collection at higher resolution for sale at affordable prices on Alila Medical Media website.

To download: right click on full size image – choose “Save image as” and save it into your computer. By downloading from this website you acknowledge that you agree to our Conditions of Use.
To purchase larger sizes of the image: (left) click on full size image.

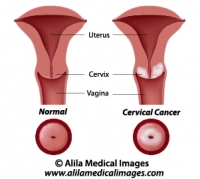
Cervical cancer, labeled diagram.
Diagram showing cancer of the cervix, labeled.
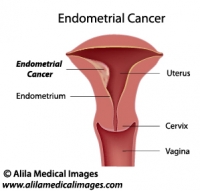
Uterine cancer, labeled diagram.
Illustration of tumor of the endometrium of female uterus, labeled.
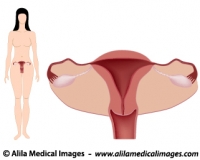
Women's system simple version, unlabeled.
Diagram showing female body with anatomy of reproductive system, anterior view, simple unlabeled version.
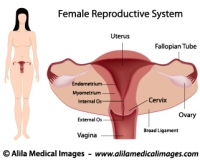
Women's system simple version, labeled.
Diagram showing female body with anatomy of reproductive system, anterior view, simple labeled version.
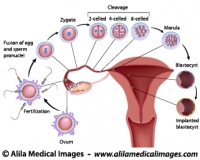
From fertilization to implantation, labeled diagram.
Diagram showing early human embryo development events, from fertilization to implantation of blastocyst, labeled.
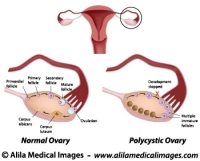
Polycystic and normal ovary, labeled diagram.
Normal ovarian cycle and Polycystic ovary syndrome illustration, labeled.
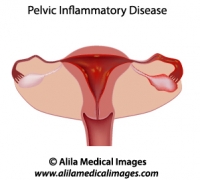
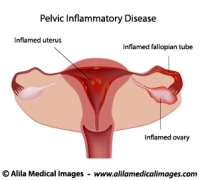
Pelvic inflammatory disease (PID)
Pelvic inflammatory disease (PID) diagram, unlabeled
Pelvic inflammatory disease (PID) diagram
Pelvic inflammatory disease (PID) diagram, labeled
Axillary lymph nodes, medical drawing.
Axillary lymph nodes diagram, simple version. 1-3 = different groups of axillary nodes, 4= supraclavicular lymph nodes. Unlabeled diagram.
Breast cancer staging, diagram.
Stages of Breast Cancer, from small tumor to metastasis, medical illustration, unlabeled.
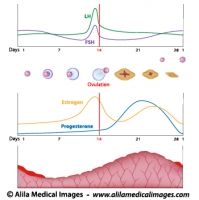
Menstrual cycle and ovulation, labeled diagram.
Normal menstrual cycle and the hormonal control of ovulation, labeled illustration.
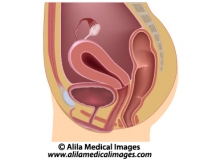
Women's reproductive system, unlabeled diargam.
Diagram showing organs of female reproductive tract in median section.
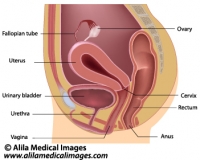
Women's reproductive system, labeled diargam.
Diagram showing organs of female reproductive tract in median section.
Ovum and spermatozoon structure, labeled diagram.
Egg and sperm cells anatomy, labeled drawing.


Email this to someoneShare on FacebookTweet about this on TwitterShare on Google+Share on LinkedIn

Oral Cavity Gallery

Download illustrations of permanent and deciduous dentition, tooth anatomy, periodontal diseases, teeth replacement therapy, mouth anatomy and diseases.

Please note: Free downloads are intended to facilitate healthcare education for people in need in low income countries and can be used for educational purposes only. If you can afford it or if you plan to use the images for commercial purposes, please consider buying instead. You can find a larger image collection at higher resolution for sale at affordable prices on Alila Medical Media website.

To download: right click on full size image – choose “Save image as” and save it into your computer. By downloading from this website you acknowledge that you agree to our Conditions of Use.
To purchase larger sizes of the image: (left) click on full size image.

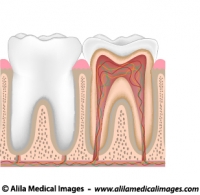
Tooth anatomy, unlabeled diagram.
Tooth anatomy from outside and in cross section, unlabeled drawing.
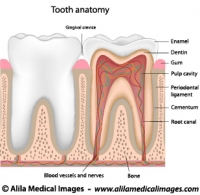
Tooth anatomy, labeled diagram.
Tooth anatomy from outside and in cross section, labeled drawing.
Dental checkup icon
Dental checkup icon
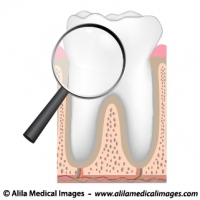
Magnifying glass on a molar tooth, illustration.
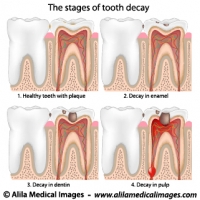
Plaque and tooth decay, medical drawing.
Tooth decay stages diagram.
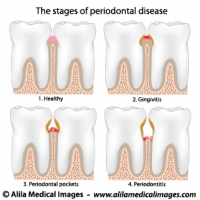
Periodontal Disease, labeled diagram.
Gum disease stages, from gingivitis to periodontitis.
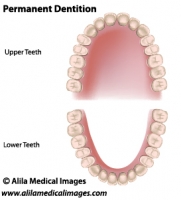
Adult dentition, medical drawing.
Permanent teeth, adult dentition, upper and lower jaws, unlabeled.
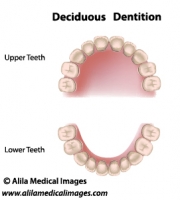
Deciduous dentition, medical drawing.
Deciduous dentition (baby or milk teeth), upper and lower jaws, medical illustration unlabeled..
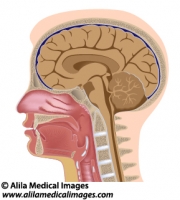
Head anatomy median section, medical drawing.
Median section of human head diagram with details of brain, sinuses, tonsils, oral and nasal cavity, pharynx and larynx, unlabeled.
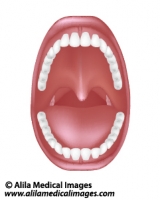
Mouth and throat anatomy, medical drawing.
Diagram of human oral cavity with denture, tonsils, unlabeled.


Email this to someoneShare on FacebookTweet about this on TwitterShare on Google+Share on LinkedIn